In this tutorial, we’ll get into the basics of the display by building a simple Larson Scanner that will chase LEDs using the IS31FL3728 LED Driver and bar graph of the I2C Display Add-on v2.
Background
I2C Display v2 Functionality Overview
I2C Display v2 Tutorial 01: IS31FL3728 Display Driver
I2C Basics
Changing the I2C Library
IS31FL3728 Datasheet
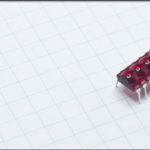
I2C Display Setup
The Display only requires six connections: 5V, GND, SCL, SDA as well as a connection for the shutdown pin and the piezo speaker. It was designed to work directly with the I2C and SPI Education Shield, and because of that, it does not have I2C pull up resistors on board. Depending on what you’re connecting to, it may be necessary to provide those resistors, or to configure the I2C pins you use to use internal pull up resistors. For general connections to an Arduino or other development board, pull up resistors of 4.7K should be sufficient.
For this tutorial, I’ve connected the I2C Display Add-on to an Arduino Uno directly, and will be using the internal pull up resistors.
Larson Scanner
A Larson Scanner, for those who aren’t familiar with it, is a simple display that has LEDs that chase back and forth, left to right to left. If you think of the nose of the car KITT from Knight Rider, or the eyes of the Cylons from the 80s version of Battlestar Galactica, that’s what a Larson Scanner is. In fact, it’s called a “Larson Scanner” because the creator of those two shows specifically, was Glen A. Larson.
So what we’re going to do, is have the row of blue LEDs act as a Larson Scanner on the I2C Display. And just because we don’t want to ignore the seven segment display, we’ll count how many times we’ve scanned and display it numerically.
I2C Larson Scanner Code Plan
As usual, we’ll want to start with a pretty descriptive set of declarations to reference the various registers of the IS31FL3728, so that we’re not guessing at what our code does. There is a bit of configuration necessary to get the chip running as well, so a function to perform chip initialization will be necessary.
We’re going to want to update the display quite frequently, and since we’re updating two different things, the number display and the bar graph, it would get ugly fast if we put all of that into the main loop of our sketch. So we’ll want to create display update functions for each.
Finally, because the registers hold their values through all conditions except a power off, we need to create a simple function to write zeros to the display to clear all the patterns at startup.
Declarations
First things first… load the library by putting #include <I2C.h> right at the top of your sketch. This is a common mistake to make and will cause all kinds of compile havoc if you forget it.
We need to create a description of the I2C address of our IS31FL3728, and then each of the registers we’ll need to work with in this sketch, including the digit registers. There’s also the little variable that will hold how many times we’ve scanned left-right-left with the bar graph, so we can display it on the 7SEG.
Then we finally need to create an array to hold the patterns that correspond to the digits we want to display. By loading the patterns in at their respective places in the array, it makes it very easy to get the right number to display at the right digit.
|
1 2 3 4 5 6 7 8 9 10 11 12 13 14 15 16 17 18 19 20 21 |
#include <I2C.h> const byte IS31FL3728_I2C = 0x60; // IS31FL3728 I2C Address and Registers. Driver Address Pin is Tied Low. const byte IS31_R_CONFIG = 0x00; // Configuration Register const byte IS31_R_BRIGHT = 0x0D; // Brightness / Audio Gain Register const byte IS31_R_UPDATE = 0x0C; // OpCode used to latch display update const byte DUMMY_DATA = 0xCC; // OpCode needs to be sent dummy value const byte TOP_R = 0x01; // top RED LED in RGB die const byte TOP_G = 0x02; // top GRN LED in RGB die const byte TOP_B = 0x03; // top BLU LED in RGB die const byte DIG_D = 0x04; // extra marking LEDs in display const byte DIG_3 = 0x05; // Number 3 display in 0 1 2 3 order const byte DIG_2 = 0x06; // Number 2 display in 0 1 2 3 order const byte DIG_1 = 0x07; // Number 1 display in 0 1 2 3 order const byte DIG_0 = 0x08; // Number 0 display in 0 1 2 3 order const byte numPatterns[20] = {0x7E, 0x0C, 0xB6, 0x9E, 0xCC, 0xDA, 0xFA, 0x0E, 0xFE, 0xDE}; const byte pinShutdown = A3; int scanCycles = 0; // A variable to hold how many times the scanner cycles |
Setup
The Setup function is going to be pretty simple. First things first, get the Serial system initialized in case we need to add any debug output. Then Analog 3, which controls the shutdown pin, needs to be driven high.
Because we’re using the customizable I2C library, and not the Wire library, the serial protocol needs to be configured. We need to initialize the buffers, enable internal pull up resistors, set our bus speed to 400kHz, and prepare a timeout value to keep our sketch from jamming if something fails to update the microcontroller appropriately.
A single I2C write operation is used to ensure our configuration register is set to 0x00, and another to set the brightness of the display to its lowest value.
Finally, we call the clearDisplay() function to reset all the display registers to 0x00.
|
1 2 3 4 5 6 7 8 9 10 11 12 13 14 15 16 17 18 |
void setup() { pinMode (pinShutdown, OUTPUT); // Configure the shutdown pin as output digitalWrite (pinShutdown, HIGH); // Enable the bottom row red LED, not L1/L2/L3 I2c.begin (); // Initialize the I2C library I2c.pullup (1); // Enable the internal pullup resistors I2c.setSpeed (1); // Enable 400kHz I2C Bus Speed I2c.timeOut (250); // Set a 250ms timeout before the bus resets Serial.begin(9600); I2c.write(IS31FL3728_I2C, IS31_R_CONFIG, 0x00); // Configure Driver for Normal Operation, Audio Disabled, 8x8 Matrix Mode I2c.write(IS31FL3728_I2C, IS31_R_BRIGHT, 0x08); // Configure brightness to lowest value clearDisplay(); } |
Main Loop
To keep everything clean, the main loop is just going to call the i2c Larson scanner function, and the scan cycle count display function.
|
1 2 3 4 5 6 |
void loop() { cycleLarsonScanner(); updateScanCount(); } |
cycleLarsonScanner
This isn’t going to be the fanciest of Larson Scanners, but merely a demo to get the board up and running for you. So the bit won’t accelerate / decelerate or fade or any of the real cool things that people can get it to do. What it will do is just chase a bit back and forth across both the blue bar graph.
To do that, we’ll just need simple for loops. The first one will send the bit to the left, by shifting the value 0x01 the amount of places to the left dictated by how far we are through the first loop.
The second one will send the bit to the right, by shifting the value 0x08 the amount of places to the right dictated by how far we are through the second loop. Then after each update of the TOP_B register, we have to send some dummy value to the UPDATE register in order to shift the new pattern out to the display.
The only tricky part of this, is not re-displaying the bits at the ends by duplicating them in the two loops. That’s why the first loop will go from bit 0 to bit 6 and the second loop goes from bit 7 to bit 1.
A delay has to be included to allow our eyes to see the actual movement. To slow and it looks clunky, too fast and it just blinks. I set a speed of 40 for the delay and that’s nice and zippy, but not too zippy.
At the end of the function, we increment how many times we’ve cycled through the scanner, until we get to 9999 when we reset it to zero, so we don’t start displaying funky characters on the display.
|
1 2 3 4 5 6 7 8 9 10 11 12 13 14 15 16 17 18 19 20 21 |
void cycleLarsonScanner() { byte scannerSpeed = 40; // Send the bit to the left for (int i = 0; i < 7; i ++) { I2c.write(IS31FL3728_I2C, TOP_B, 0x01 << i); I2c.write(IS31FL3728_I2C, IS31_R_UPDATE, DUMMY_DATA); delay(scannerSpeed); } // Send the bit to the right for (int i = 0; i < 7; i ++) { I2c.write(IS31FL3728_I2C, TOP_B, 0x80 >> i); I2c.write(IS31FL3728_I2C, IS31_R_UPDATE, DUMMY_DATA); delay(scannerSpeed); } // increment the scanCycles variable, unless it's already at 9999, then reset it if (scanCycles == 9999) scanCycles = 0; scanCycles++; |
updateScanCount
This one is very simple. Since we’re decoding the values we send to the first four digits of the display, all we have to do is send the actual value we want to show, right to the digits register. To do that, we just have to break a four digit number into it’s constituent places by using some division and some modulo math.
|
1 2 3 4 5 6 7 8 9 10 |
void updateScanCount() { I2c.write(IS31FL3728_I2C, DIG_0, numPatterns[(scanCycles / 1000)]); I2c.write(IS31FL3728_I2C, DIG_1, numPatterns[(scanCycles % 1000 / 100)]); I2c.write(IS31FL3728_I2C, DIG_2, numPatterns[(scanCycles % 1000 % 100 / 10)]); I2c.write(IS31FL3728_I2C, DIG_3, numPatterns[(scanCycles % 1000 % 100 % 10)]); I2c.write(IS31FL3728_I2C, IS31_R_UPDATE, DUMMY_DATA); } |
clearDisplay
The function to overwrite the existing display patterns back to 0 is very simple. The register addresses that control the individual digits and bar graph are all sequentially numbered from 0x01 to 0x08, so by using a for loop, you can easily hit each register address and I2C write the 0x00 value to it, then finish by sending the dummy data to the update register.
|
1 2 3 4 5 6 |
void clearDisplay() { for (int i = 1; i < 9; i++) { I2c.write(IS31FL3728_I2C, i, 0x00); } I2c.write(IS31FL3728_I2C, IS31_R_UPDATE, DUMMY_DATA); } |
Full Sketch
And finally, here’s the entire sketch fully assembled…
|
1 2 3 4 5 6 7 8 9 10 11 12 13 14 15 16 17 18 19 20 21 22 23 24 25 26 27 28 29 30 31 32 33 34 35 36 37 38 39 40 41 42 43 44 45 46 47 48 49 50 51 52 53 54 55 56 57 58 59 60 61 62 63 64 65 66 67 68 69 70 71 72 73 74 75 76 77 78 79 80 81 82 83 84 85 86 87 88 89 90 91 92 93 94 95 96 97 98 |
/* A sketch that displays a simple Larson Scanner using the blue bar graph LEDs on the I2C Display Add-on v2 board, and displays a running count of how many times the scan has cycled through. https://rheingoldheavy.com/i2c-display-add-on-tutorial-02-larson-scanner/ */ #include const byte IS31FL3728_I2C = 0x60; // IS31FL3728 I2C Address and Registers. Driver Address Pin is Tied Low. const byte IS31_R_CONFIG = 0x00; // Configuration Register const byte IS31_R_BRIGHT = 0x0D; // Brightness / Audio Gain Register const byte IS31_R_UPDATE = 0x0C; // OpCode used to latch display update const byte DUMMY_DATA = 0xCC; // OpCode needs to be sent dummy value const byte TOP_R = 0x01; // top RED LED in RGB die const byte TOP_G = 0x02; // top GRN LED in RGB die const byte TOP_B = 0x03; // top BLU LED in RGB die const byte DIG_D = 0x04; // extra marking LEDs in display const byte DIG_3 = 0x05; // Number 3 display in 0 1 2 3 order const byte DIG_2 = 0x06; // Number 2 display in 0 1 2 3 order const byte DIG_1 = 0x07; // Number 1 display in 0 1 2 3 order const byte DIG_0 = 0x08; // Number 0 display in 0 1 2 3 order const byte numPatterns[20] = {0x7E, 0x0C, 0xB6, 0x9E, 0xCC, 0xDA, 0xFA, 0x0E, 0xFE, 0xDE}; const byte pinShutdown = A3; int scanCycles = 0; // A variable to hold how many times the scanner cycles void setup() { pinMode (pinShutdown, OUTPUT); // Configure the shutdown pin as output digitalWrite (pinShutdown, HIGH); // Enable the bottom row red LED, not L1/L2/L3 I2c.begin (); // Initialize the I2C library I2c.pullup (1); // Enable the internal pullup resistors I2c.setSpeed (1); // Enable 100kHz I2C Bus Speed I2c.timeOut (250); // Set a 250ms timeout before the bus resets Serial.begin(9600); I2c.write(IS31FL3728_I2C, IS31_R_CONFIG, 0x00); // Configure Driver for Normal Operation, Audio Disabled, 8x8 Matrix Mode I2c.write(IS31FL3728_I2C, IS31_R_BRIGHT, 0x08); // Configure brightness to lowest value //clearDisplay(); } void loop() { cycleLarsonScanner(); updateScanCount(); } void cycleLarsonScanner() { byte scannerSpeed = 40; // Send the bit to the left for (int i = 0; i < 7; i ++) { I2c.write(IS31FL3728_I2C, TOP_B, 0x01 << i); I2c.write(IS31FL3728_I2C, IS31_R_UPDATE, DUMMY_DATA); delay(scannerSpeed); } // Send the bit to the right for (int i = 0; i < 7; i ++) { I2c.write(IS31FL3728_I2C, TOP_B, 0x80 >> i); I2c.write(IS31FL3728_I2C, IS31_R_UPDATE, DUMMY_DATA); delay(scannerSpeed); } // increment the scanCycles variable, unless it's already at 9999, then reset it if (scanCycles == 9999) scanCycles = 0; scanCycles++; } void updateScanCount() { I2c.write(IS31FL3728_I2C, DIG_0, numPatterns[(scanCycles / 1000)]); I2c.write(IS31FL3728_I2C, DIG_1, numPatterns[(scanCycles % 1000 / 100)]); I2c.write(IS31FL3728_I2C, DIG_2, numPatterns[(scanCycles % 1000 % 100 / 10)]); I2c.write(IS31FL3728_I2C, DIG_3, numPatterns[(scanCycles % 1000 % 100 % 10)]); I2c.write(IS31FL3728_I2C, IS31_R_UPDATE, DUMMY_DATA); } void clearDisplay() { for (int i = 1; i < 9; i++) { I2c.write(IS31FL3728_I2C, i, 0x00); } I2c.write(IS31FL3728_I2C, IS31_R_UPDATE, DUMMY_DATA); } |
For more I2C Display tutorials, Click Here.