It is my great pleasure to introduce you to the Rheingold Heavy Holiday Project: The 2015 Snowbot Rev1.
Snowbot Project Files
| Design File | File Name |
|---|---|
| OSHPark Project Link: | https://oshpark.com/shared_projects/7TcE6RdU |
| Stencil Files: | snowbot_2015_rev1_paste_stencil.zip |
| BOM - Individual Line Items: | snowbot_2015_rev1_full_bom.csv |
| BOM - Sorted By Quantity: | snowbot_2015_rev1_quantities.csv |
| Gerber Files: | snowbot_2015_rev1_gerbers.zip |
| KiCad Project Archive: | Snowbot_2015_Rev1.zip |
| Assembly Instructions: | Snowbot Assembly Guide |
The estimated cost using OSHPark for boards is $43.20 / 3 PCBs.
The estimated cost using Digi-Key for parts is $18.57 / 1 Snowbot.
Additionally, the BOM lists connectors for a LiPO battery, but not the battery itself. I bought a four pack of 680mAh LiPOs complete with a cheap charger from Amazon for $18, and it’s this cheap Molex-ish connector that the BOM is based on. You’ll also need a short couple of lengths of 24AWG stranded wire to crimp the male battery connector to.
Snowbot Description
When I started thinking of this project, I wanted to make something that included a bit of the basics and something more advanced. It had to be battery powered, and most importantly, I wanted to make sure it went against the grain of everything needing a microcontroller. Thus Snowbot was born.
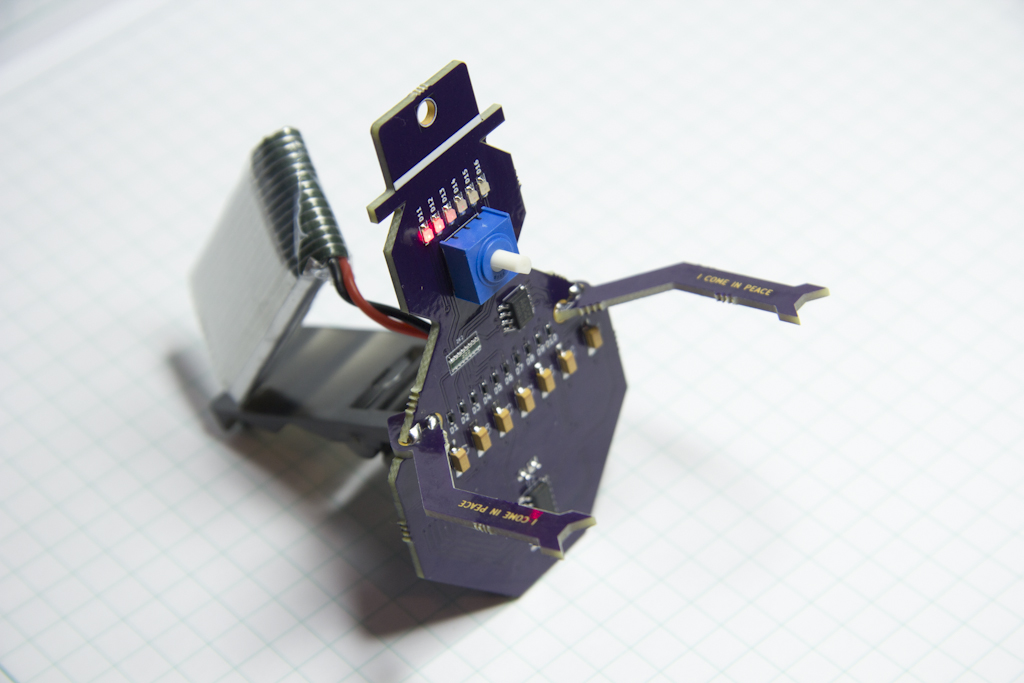
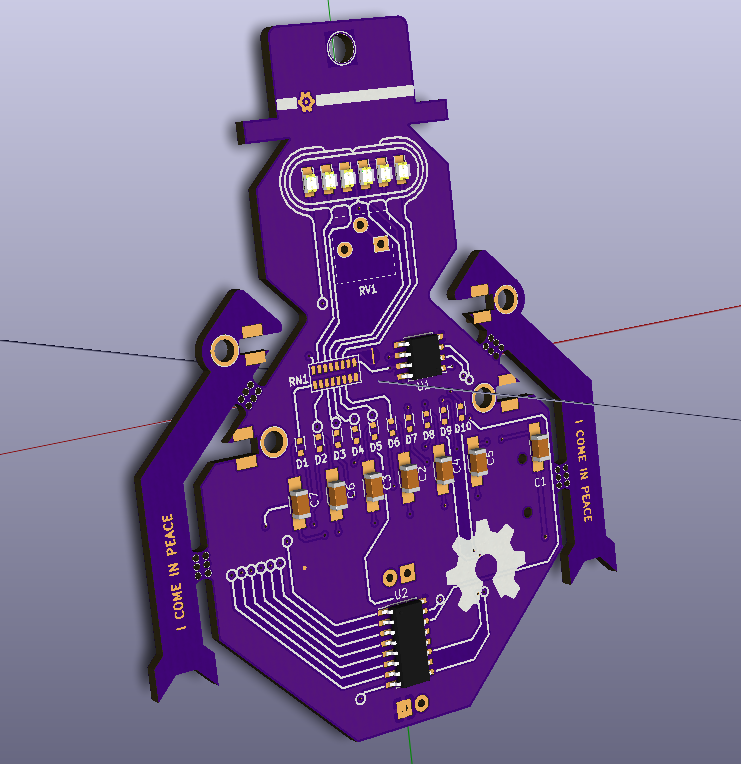
Snowbot is an ornament 3.3″ tall by 2.6″ wide (83mm x 66mm), that features a six LED Larson Scanner as an “eye”. The scanner speed is controlled through Snowbot’s nose, a 10K potentiometer. This sets the timing of a 555 Timer configured as an astable vibrator, clocking pulses to a CD4107 Decade Counter. The decade counter outputs each channel through a diode to an LED, resistor and capacitor. When the channel is on, it lights the LED through the current limiting resistor, and also charges the capacitor. When the channel is off, the diode prevents the current draining from the capacitor back into the decade counter, forcing it to discharge back through the LED (and it’s current limiting resistor). The RC network on the input to the LED creates a very nice, Cylon-esque, fade out as the LEDs chase from one to the next.
This is an example of the prototype used for the assembly instructions…
The published version contains the exact same circuitry, just a few small extra adornments as well as allowing the customizations explained below.
Snowbot is designed to be powered by a 3.7V LiPO Battery. If you use a different LiPO, you’ll have to be careful with how you choose to connect it to the board. As designed, the board draws 14mA of current with the scanner at full blast.
The arms can be snapped off the edge of the snowbot and soldered into place if you want as well.
How To Use The Files
Snowbot Circuit Boards
The link to the OSHPark Project is a publicly shared version of the board that is ready to order. You don’t have to upload anything. Just select the project and order it! If you want to use a different PCB fabricator, the full gerber files are provided as well for your use.
Snowbot Parts
The BOM – Sorted By Quantity file is upload compatible with any distributor you want to use. It has the manufacturer’s name (MFN column), manufacturer’s part number (MFP column), Quantity (quantity column), Reference Designator (ref column), as well as various descriptions. Each distributor BOM upload is a little different, but hopefully you’re familiar with them. If you aren’t, don’t hestitate to email the BOM to their sales department to have them put the order together for you. The BOM quantities are ONLY FOR A SINGLE BOARD. If you want to build more, you’ll have to multiply the quantities.
Snowbot Solder Paste Stencil
If you want to reflow the boards using solder paste instead of hand soldering, you can use the stencil zip file with OSHStencils.
Snowbot Design Files
If you want to view the schematic in full as well as the board layout, the full KiCad Project Archive can be downloaded, unzipped and viewed in KiCad v4.00 RC1 or higher.
Snowbot Customizations
There are several customization options I’ve enabled on the board you can consider depending on your level of electronics experience.
Different Powering Option
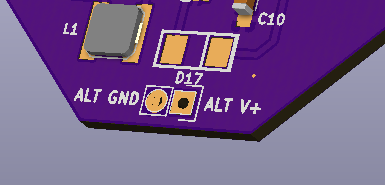
If you want to power Snowbot from something other than a 3.7V LiPO, don’t populate any of the power regulation on the back of the board, but supply it with >=5V using the alternate power connection at the bottom of Snowbot. Connecting a 9V battery will result in brighter LEDs and slightly longer fade times, and require you to bodge on a power switch.
Brighter LEDs
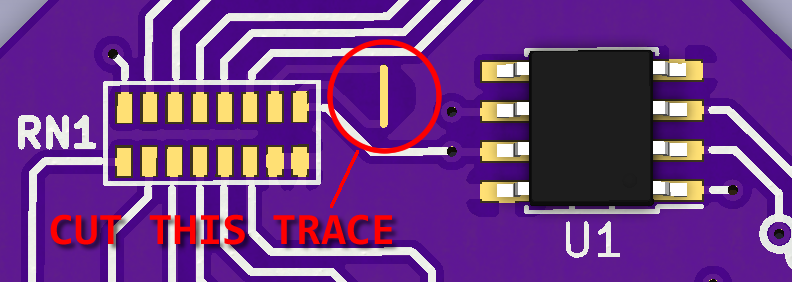
Because of the way I wound up testing the circuit (long story), it uses a single 2.2K resistor per LED to act as both the current limiting resistor as well as timing the capacitor discharge. The LED would be safe with a resistor 1/10th that size, but then the capacitors would need to be huge. You can replace RN1, the 2.2K resistor network, with a 1K resistor network like the CTS Resistor Products 742C163102JP, to make the LEDs much brighter. However, part of the resistor network is used to time the 555 chip, by using two 2.2K in parallel. Since this customization will drop that resistance in half, you only need one of the resistors in that pair. To fix that, cut the trace that is exposed through the solder mask, just to the left of the 555 timer. You’ll also need to double the C2 through C7 tantalum capacitor size to 47uF, to preserve the same fade rate.
Don’t Care About Fading
If you don’t care about having the fade, you can choose not to populate the tantalum capacitors at all (C2 through C7). All the remaining values can remain the same.
