In Part 15, we laid out our design requirements. I’ve thought about them over the intervening weeks and I’ve made some decisions on how to proceed with an Arduino Prototype Plan.
Prototype Design Decisions
I’m going to preserve the shield header footprint, the auto reset capability, external power connection and ICSP headers. However some of those items can be changed, and some features can be added.
External Power
I think instead of regulating 7-12V down to 5V, I might use a boost converter instead and allow the use of 3.7V LiPO batteries. This is a major departure from most implementations, and will cause a certain incompatibility with the standard Uno. An alkaline 9V under 100mA load will only last around 3-5 hours, and a lithium 9V around 7 hours. However, LiPO Cells come in so many sizes and capacities, that it would be easy to purchase one that would easily exceed 10 hours under continuous 100mA load. I believe I’ll also be able to find a boost converter with more efficiency that the 5V regulator that was on board originally.
I used a boost converter to take 3.7V to 9V for the Snowbot Project, so hopefully, I’ll be able to use a similar power arrangement for the Arduino.
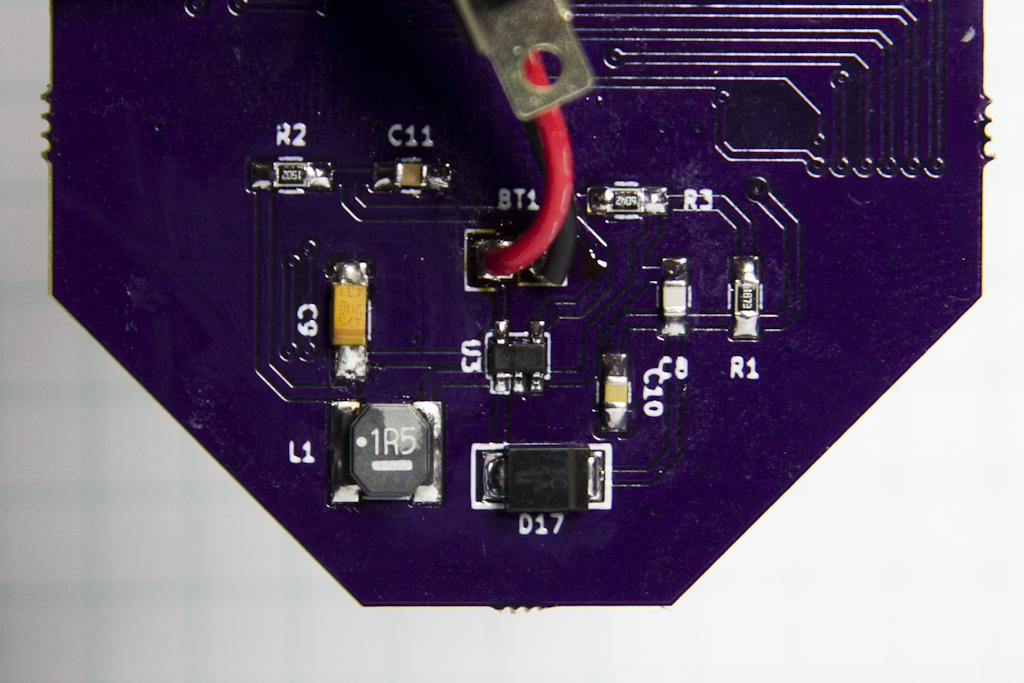
This will require necessitate some reconfiguring of the Op-amp comparator circuit.
Auto Reset
Using the Roadrunner-Coyote ACME style reset pulse generator, when there are dirt cheap ICs out there that perform exactly that specific function, seems goofy. I’ll try to see if I can get one that will hold the circuit voltage correctly to allow programming to take place.
Changing USB-to-UART
It seems wasteful to me, for a full 16U2 microcontroller to sit on the board wasting power without doing anything. The normal load caused by the micro is so bad, that I want to get rid of it and replace it entirely. Ideally, what I’d like to do, is place a header on the board to which a Serial-to-UART breakout can be connected / disconnected so that in a remote installation, it doesn’t need to be there at all.
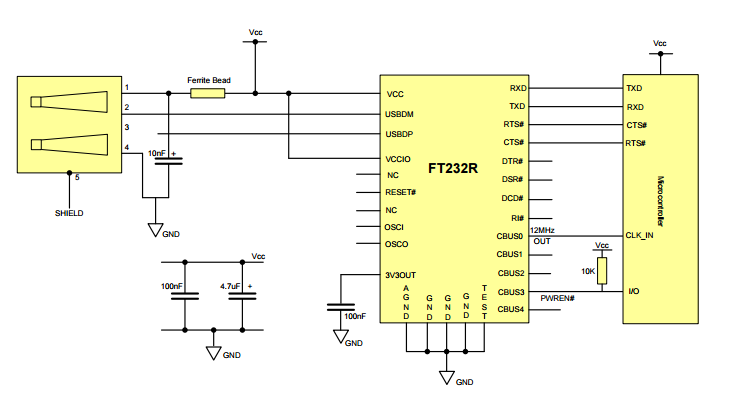
Because of the current re-eruption of the problems with FTDI, I’m debating what the best replacement chip will be. I’ll start with an FTDI FT23x of some sort, though, and go from there.
Connectors
The shield headers will be converted from through hole to surface mount to reduce the cost of assembly. The USB Connector will be changed to a mini (possibly micro) USB. I’ll start with mini and see how that works.
More SMD
I’ll go with the SMD version of the ATMEGA328P. This will reduce the assembly cost even further. I debated how much someone might want to remove the PTH version for use in another project, and realized most users won’t ever do that. I’ll side with power efficiency over flexibility on this one. I can always add a row of through holes a user can solder a socket or set of machine pinheaders to.
Test Points
I want to add a pair of jumpers on the board in series with the board VCC, that can be removed to allow measurement of current draw under load. I’d also like to provide easily accessible test points for voltage measurement on the VIN, 5V and 3V3 rail.
Arduino Prototype Plan
So, with all those additions and changes, what’s the next step? Well, the best thing to do is to build it out subsystem by subsystem, just like we tore the schematic apart in the first place. Each of those subsystems should be tested individually to make sure they work as concepts and then the subsystems combined. That’s how you build a prototype plan.
Things like test points and a current measuring header don’t really need to be isolated for testing, they’re just footprints (correctly placing the current measuring header will require some thought). The new power system running off of a LiPo will need to be tested, as will the redesigned comparator. The replacement of the 16U2 with the FT230X will need to be tested, and so will the new reset circuit.
All of those changes will need to be engineered, tested, fixed (because they’re all going to contain mistakes), repaired, and tested again. And based on my previous experience, I can forthrightly say I’ll need to go through all those steps, several times per circuit.
So step one… redesign the power circuit…
